▸FREE SHIPPING ABOVE ₹300▸USE CODE SHINE10 FOR 10% OFF▸COD AVAILABLE ACROSS INDIA▸MADE IN INDIA · MADE FOR INDIAN ROADS▸5,000+ ORDERS SHIPPED▸FREE SHIPPING ABOVE ₹300▸SHINE10 = 10% OFF FIRST ORDER▸FREE SHIPPING ABOVE ₹300▸USE CODE SHINE10 FOR 10% OFF▸COD AVAILABLE ACROSS INDIA▸MADE IN INDIA · MADE FOR INDIAN ROADS▸5,000+ ORDERS SHIPPED▸FREE SHIPPING ABOVE ₹300▸SHINE10 = 10% OFF FIRST ORDER
How to Remove Car Scratches at Home (Step-by-Step Guide)
MH
Motor Headz Team
PUBLISHED 13 APR 2026
▸ TL;DR
Most car scratches sit in the clear coat, which is often just 30–50 microns thick. Learn how to remove car scratches at home safely in India.
# How to Remove Car Scratches at Home (Step-by-Step Guide)
A scratch on your car can feel much worse than it looks. One careless wipe, one parking-lot brush, one bike handle passing too close, and suddenly your door panel steals all the attention. The good news? Not every scratch needs a body shop. In fact, many scratches sit in the upper clear coat, which means you can reduce or remove them at home if you work carefully.
That said, DIY scratch removal is not about rubbing harder. It’s about identifying the depth, choosing the right method, and stopping before you damage the paint.
> **TL;DR:** You can remove many light car scratches at home if they sit in the clear coat, but deeper scratches need touch-up paint or professional repair. Since automotive clear coat is often only **30–50 microns thick**, aggressive rubbing can do more harm than good, so the safest method is always the least aggressive one that works ([Dr. Beasley’s](https://www.drbeasleys.com/blog/2024/11/08/how-often-should-i-polish-my-car), 2024).
[INTERNAL-LINK: complete guide to car detailing → pillar post on washing, decontamination, polishing, and protection]
## How can you tell whether a scratch can be fixed at home?
Modern factory paint systems often measure around **100–180 microns** in total thickness, according to DeFelsko, and only part of that is clear coat ([DeFelsko](https://www.defelsko.com/resources/how-to-use-paint-thickness-gauges-for-better-automotive-detailing), 2025). The practical answer is simple: **if the scratch is light, does not expose primer or metal, and barely catches your fingernail, it can often be improved at home**.
Start with a clean panel. Never inspect scratches on a dusty surface. Dust hides the true depth and turns your next wipe into more scratching. Wash the area, dry it gently, and inspect it under sunlight or a bright LED torch.
Then do the fingernail test. Lightly drag a clean fingernail across the mark. If your nail does not catch, the scratch is usually shallow. If it catches slightly, you may still improve it with compound, polish, or scratch remover. If it catches hard, or if you can see white, grey, or metal underneath, the damage is deeper and likely needs touch-up paint or repainting.
There’s also a simple water test. Spray water on the scratch. If the mark seems to disappear when wet and then returns when dry, it usually means the scratch is in or near the clear coat. That’s a strong sign that correction may help.
According to DeFelsko, paint correction decisions should be based on preservation as much as appearance because polishing removes measurable film build ([DeFelsko](https://www.defelsko.com/resources/how-to-use-paint-thickness-gauges-for-better-automotive-detailing), 2025). So before you chase perfection, identify the scratch properly.
In Indian conditions, a lot of “scratches” are actually combinations of dry-wipe marring, transfer marks from another object, hard-water etching, and grime. That matters. If you diagnose too fast, you may treat a stain like a scratch and overwork the panel for no reason.
**At-home repair usually works best for:**
– clear-coat swirls and light wash marks
– shallow scratches from fingernails near door handles
– paint transfer from another object
– light scuffs from bags, shoes, or minor contact
– isolated surface marks on otherwise healthy paint
[INTERNAL-LINK: types of car scratches explained → article covering clear coat, primer, and deep-paint damage]
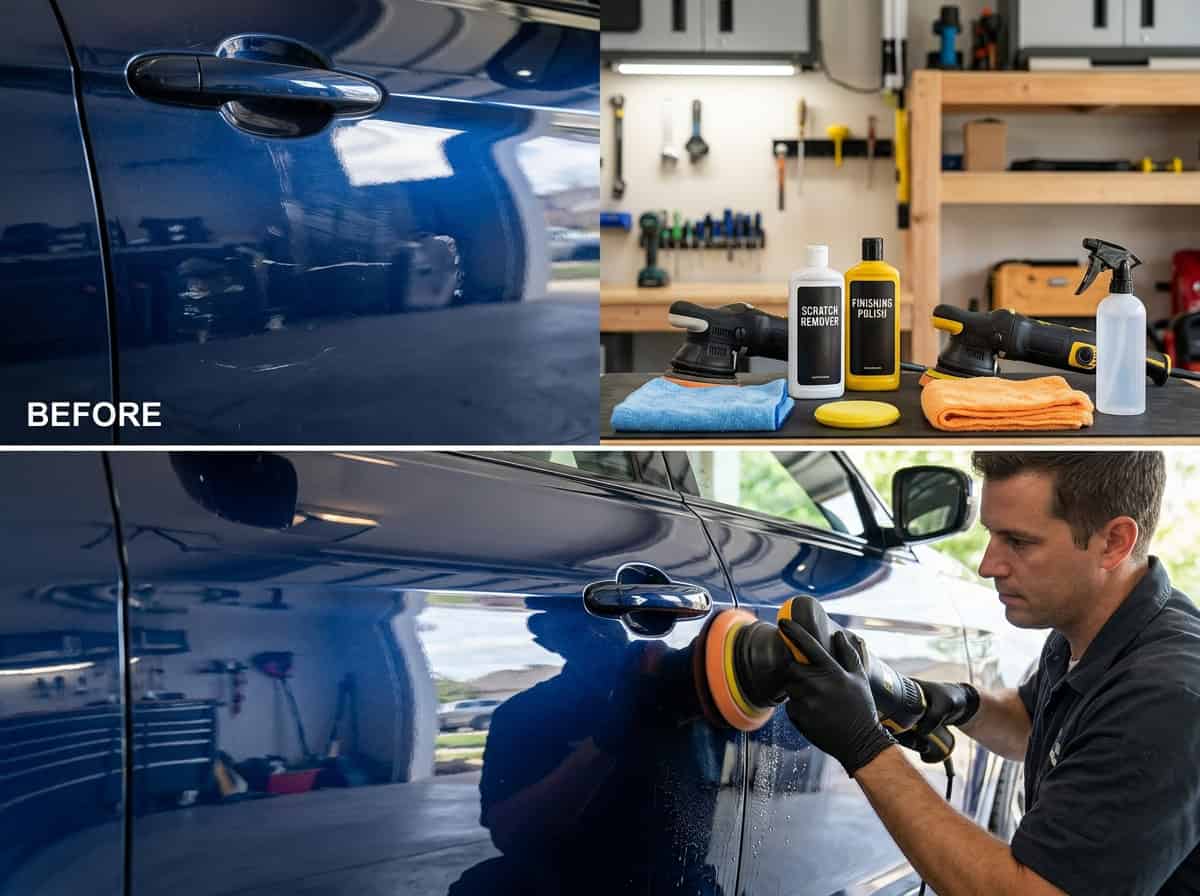
Before removing a scratch, inspect it under strong light and figure out how deep it really is.
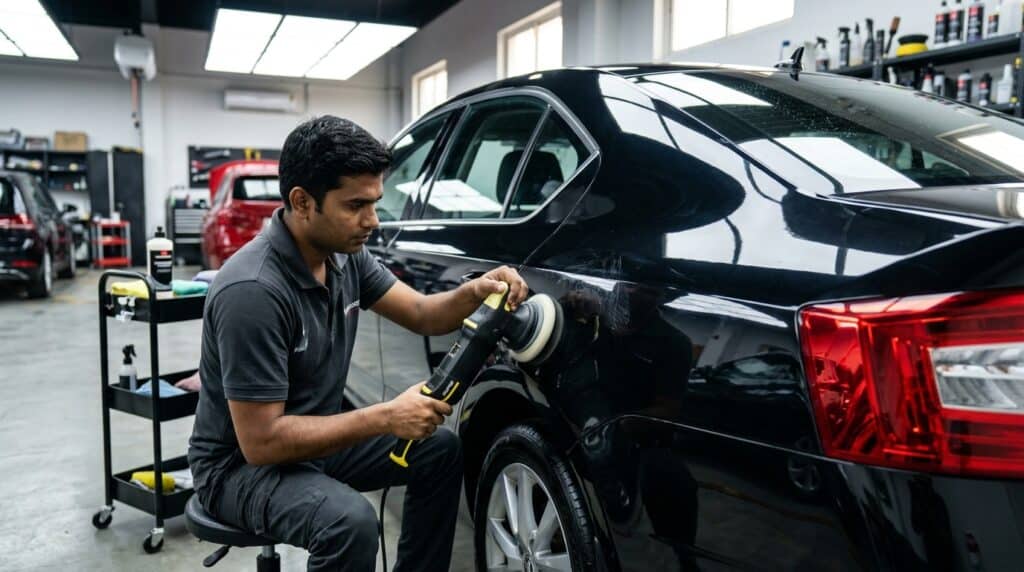
## What tools do you need to remove car scratches at home?
The safest DIY scratch repair starts with good prep, not a miracle bottle. Since paint correction can remove **2–5 microns** in a session, according to Dr. Beasley’s, your tools should help you work precisely, not aggressively ([Dr. Beasley’s](https://www.drbeasleys.com/blog/2024/11/08/how-often-should-i-polish-my-car), 2024). For most light scratches, **you only need proper wash supplies, microfiber cloths, a clay bar or clay mitt, scratch remover or polish, and a foam applicator or dual-action machine**.
Here’s a practical Indian-home setup that works well:
– pH-neutral car shampoo
– two buckets with clean water
– microfiber wash mitt
– drying towel
– clay bar or clay mitt with lubricant
– masking tape for edges and trims
– light scratch remover or rubbing polish
– polishing compound for slightly deeper defects
– foam or microfiber applicator pads
– optional dual-action polishing machine
– wax or sealant for protection after correction
Do you need a machine? Not always. For small, shallow scratches, hand application is often enough. A machine becomes useful when the defect is slightly heavier or when you want more even correction. Still, for beginners, hand correction is slower and often safer.
A self-contained rule worth remembering is this: **the best scratch-removal kit is the one that prevents new scratches while fixing the old one**. Good microfiber, proper washing, and paint protection matter as much as any scratch-removal liquid. If you use a dirty cloth, even the best product won’t save you.
Also keep expectations realistic. A ₹300 scratch remover can improve a lot. It cannot rebuild missing paint.
[INTERNAL-LINK: best car rubbing machine for beginners in India → buying guide for DA polishers, pad types, and entry-level kits]
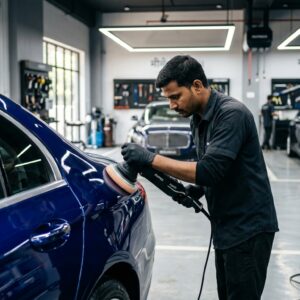
## What is the safest step-by-step method to remove light car scratches at home?
Paint-safe correction always begins with clean, cool panels because abrasive work on a dirty surface adds more defects. With clear coat often limited to **30–50 microns**, the safest method is a measured one: wash, decontaminate, test a mild product first, inspect, and only increase cut if needed ([Dr. Beasley’s](https://www.drbeasleys.com/blog/2024/11/08/how-often-should-i-polish-my-car), 2024). In short, **light scratches should be treated in layers, not attacked in one shot**.
### Step 1: Wash the area properly
Use a pH-neutral shampoo and a soft wash mitt. Rinse first to remove loose dust. Then wash the panel gently. Dry with a clean microfiber towel. If the area is still gritty, stop and clean again.
### Step 2: Remove bonded contamination
If the panel feels rough, use a clay bar or clay mitt with plenty of lubricant. This removes bonded contaminants that can interfere with polishing. Many scratches look worse because contamination surrounds the mark.
### Step 3: Mask nearby trim and sharp edges
Tape protects rubber and plastic trim from white residue. It also helps beginners stay away from thin edges, body lines, and badges.
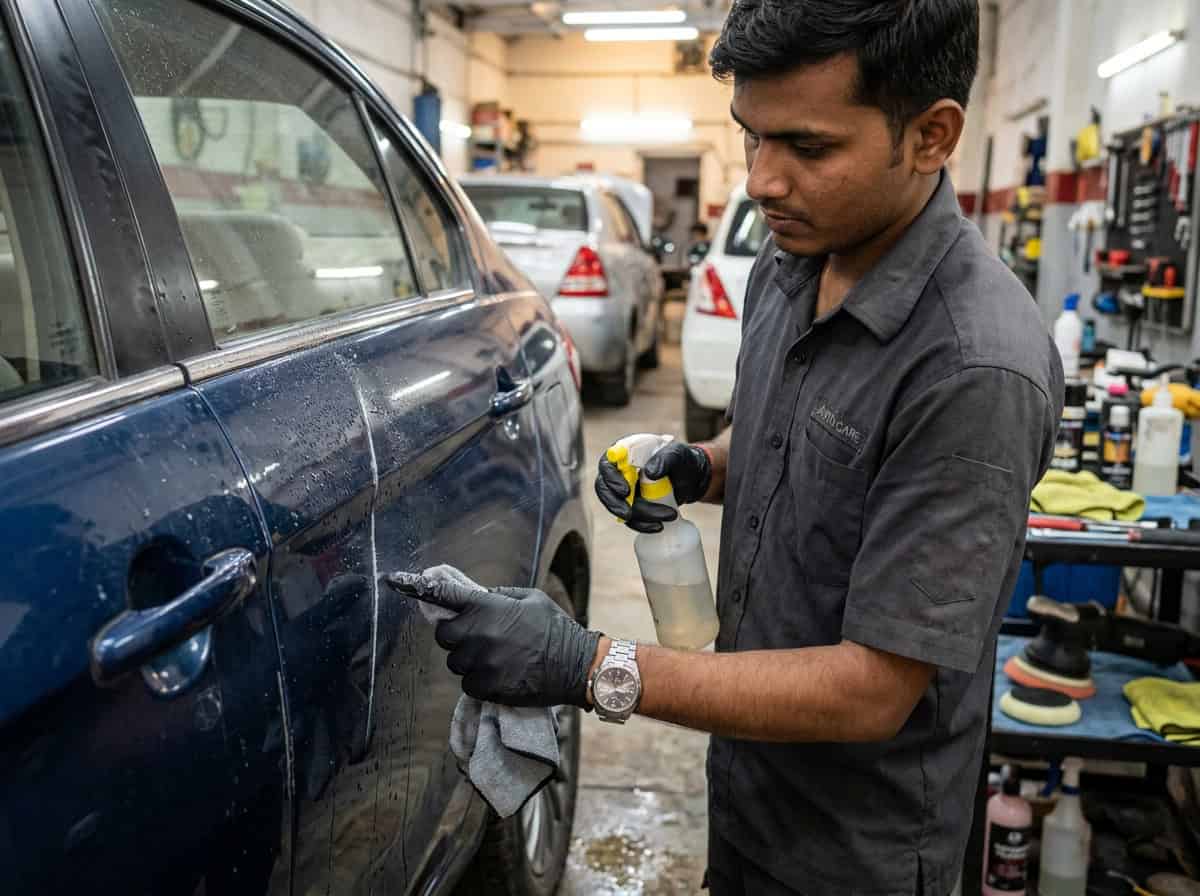
### Step 4: Start with the least aggressive product
Put a small amount of scratch remover or light polish on a foam applicator. Work a small area, about one hand span at a time. Use straight, controlled passes or tight overlapping motions. Don’t grind into one spot.
### Step 5: Wipe and inspect
Buff off residue with a clean microfiber cloth. Check the result under direct light. Has the scratch improved by 50–80%? Great. Repeat once more if needed.
### Step 6: Increase aggression only if necessary
If the scratch remains obvious, move to a slightly stronger product or a polishing compound. But test first. Never jump to heavy correction across the whole panel.
### Step 7: Refine the finish
If the stronger step leaves haze, follow with a lighter polish. This restores clarity and shine.
### Step 8: Protect the panel
Finish with wax or sealant. Freshly corrected paint needs protection, especially in India’s heat, dust, UV exposure, and hard-water environment.
The biggest DIY win usually comes from the first careful pass, not the tenth. Once a scratch is reduced enough that it stops screaming at you from six feet away, you’ve often hit the sweet spot. Chasing the last 5% is where beginners burn time and clear coat.
According to DeFelsko, using measurement-aware correction helps detailers balance defect removal with long-term paint health ([DeFelsko](https://www.defelsko.com/resources/how-to-use-paint-thickness-gauges-for-better-automotive-detailing), 2025). Even without a gauge at home, that mindset matters.
[INTERNAL-LINK: rubbing polish vs polishing compound → post explaining which product to use at each scratch depth]
## When should you use scratch remover, compound, touch-up paint, or professional repair?
Not all scratches belong in the same category. Since total automotive paint thickness may be only **100–180 microns**, according to DeFelsko, treatment should match damage depth, not frustration level ([DeFelsko](https://www.defelsko.com/resources/how-to-use-paint-thickness-gauges-for-better-automotive-detailing), 2025). The direct answer is this: **use polish or scratch remover for light marks, compound for moderate clear-coat damage, touch-up paint for deeper colour-coat damage, and professional repair when primer or metal is exposed**.
### Use scratch remover or rubbing polish when:
– the scratch is light and shallow
– your fingernail barely notices it
– the water test makes it disappear
– the paint colour is still even
– the surrounding area only has mild swirl marks
### Use polishing compound when:
– the mark is more obvious in sunlight
– light polish barely changes it
– the panel has oxidation or heavier marring too
– you are ready to refine the finish afterward
### Use touch-up paint when:
– the scratch has cut into the colour coat
– you can see a lighter line beneath the surface
– the mark stays visible after polishing
– protection matters more than a perfect cosmetic finish
### Go to a professional when:
– primer or metal is exposed
– the scratch is long and deep
– the panel has multiple defects
– the car is new, premium, or dark-coloured and you want a near-perfect result
– the area has already been repainted or repaired before
A concise citation-style takeaway: **surface correction can only level paint that still exists**. Once paint is missing, polishing will not replace it; it can only soften the appearance around the edges. That distinction saves DIYers from making deep scratches look worse.
[INTERNAL-LINK: paint correction guide → complete walkthrough of one-step, two-step, and spot-correction workflows]
Choose the repair method based on scratch depth; not every scratch needs the same treatment.
## What mistakes make car scratches worse during DIY repair?
DIY correction goes wrong when people confuse pressure with skill. Since polishing can remove **2–5 microns** and the clear coat is limited, aggressive home repair creates risk quickly ([Dr. Beasley’s](https://www.drbeasleys.com/blog/2024/11/08/how-often-should-i-polish-my-car), 2024). So yes, **most scratch-removal mistakes happen before the product even starts working**.
The first mistake is working on a dirty panel. Rubbing dust into paint is basically controlled vandalism. The second is using kitchen cloths, old banians, or cheap towels. These create fresh marring while you “repair” the original issue.
The third mistake is choosing the strongest product first. Stronger cut is not smarter correction. Then comes overworking one tiny area for too long. That creates hot spots, haze, or patchiness.
Another common problem in India is trying to fix scratches in direct sun. The product dries too fast, wiping becomes harder, and the finish turns uneven. Work in shade on cool paint whenever possible.
Don’t forget expectations. If the scratch is deep, no amount of rubbing will erase missing paint. And if it’s actually paint transfer from another object, you may need a gentler cleaning and polishing process instead of a harsher compound.
A lot of owners damage paint because they panic the same day the scratch happens. Ironically, slowing down gives better results. Wash first. Inspect. Test. Then act. Calm hands save clear coat.
**Avoid these mistakes:**
– rubbing a dirty panel
– using rough cloths or circular dry wiping
– applying too much product
– working in direct heat
– skipping a test spot
– not protecting the paint afterward
– trying to polish through deep scratches
[INTERNAL-LINK: how to wash your car at home like a pro → maintenance method that prevents new wash scratches]
## How do you stop scratches from coming back after you fix them?
Prevention matters because correction is finite. If clear coat is often only **30–50 microns**, repeated polishing is not a maintenance strategy; safe washing is ([Dr. Beasley’s](https://www.drbeasleys.com/blog/2024/11/08/how-often-should-i-polish-my-car), 2024). The simple answer is that **the best way to prevent new scratches is to upgrade your washing, drying, wiping, and protection habits**.
Start by ditching dry dusting. It is one of the fastest ways to create micro-marring on Indian cars. Use proper car shampoo, clean wash media, and the two-bucket method where possible. Dry with a plush microfiber towel or forced air.
Add paint protection after scratch removal. A wax or sealant won’t make the car scratch-proof, but it reduces friction and makes cleaning safer. It also helps grime release more easily during the next wash.
Pay attention to small habits too. Don’t place bags on the boot lid. Don’t lean against dusty panels. Don’t use the same cloth for wheels and paint. Keep separate microfiber towels for paint, glass, and interiors.
A practical, quotable takeaway: **scratch prevention is boring, which is why it works**. Gentle washing, proper towels, and regular protection are less exciting than scratch-remover videos, but they save your paint far better over time.
[INTERNAL-LINK: ceramic coating benefits for Indian cars → article on long-term paint protection against UV, dust, and water spots]
## Frequently Asked Questions
### Can toothpaste remove scratches from a car?
Toothpaste may slightly reduce extremely light marks because it has mild abrasives, but it is not a proper automotive correction product. Since clear coat is often just **30–50 microns** thick, using uncontrolled household abrasives is risky and usually gives inconsistent results compared with a real polish or scratch remover ([Dr. Beasley’s](https://www.drbeasleys.com/blog/2024/11/08/how-often-should-i-polish-my-car), 2024).
[INTERNAL-LINK: beginner paint correction kit → article on the right products for safe DIY use]
### Can I remove deep car scratches at home?
You can improve the look of some deeper scratches, but you usually cannot fully remove them if paint is missing. DeFelsko notes total automotive paint systems commonly sit around **100–180 microns**, so there is limited material available for correction before you need touch-up paint or professional repair ([DeFelsko](https://www.defelsko.com/resources/how-to-use-paint-thickness-gauges-for-better-automotive-detailing), 2025).
[INTERNAL-LINK: touch-up paint guide for Indian cars → step-by-step process for filling deeper scratches]
### Is it better to remove scratches by hand or machine?
For small, light scratches, hand correction is often safer and more than enough. A machine becomes useful for larger areas or moderate defects, but it also increases the pace of material removal. Because polishing can remove **2–5 microns** per session, beginners should always start with the least aggressive method first ([Dr. Beasley’s](https://www.drbeasleys.com/blog/2024/11/08/how-often-should-i-polish-my-car), 2024).
[INTERNAL-LINK: best car rubbing machine for beginners in India → guide comparing hand correction, DA machines, and rotary polishers]
### How much does DIY car scratch removal cost in India?
For light scratches, a basic DIY setup in India can start from a modest budget if you already own shampoo and microfiber towels. The bigger saving is avoiding unnecessary repaint work for defects that live only in the clear coat. Since many scratches are superficial, the right process matters more than expensive products.
[INTERNAL-LINK: budget-friendly detailing kit for Indian car owners → curated starter products by use case]
### Should I wax the car after removing scratches?
Yes, absolutely. Freshly corrected paint should be protected after scratch removal because the surface has been cleaned and refined. A wax or sealant helps reduce friction during future washes and adds a sacrificial layer above the corrected paint, which is important when polishing removes measurable material from the top layer.
[INTERNAL-LINK: best car wax in India → comparison of carnauba vs synthetic wax for gloss and durability]
## FAQ Schema
“`html
“`
## Yoast SEO Fields
Focus Keyphrase: how to remove car scratches at home
SEO Title: How to Remove Car Scratches at Home – Motor Headz (50 chars)
Slug: how-to-remove-car-scratches-at-home
Meta Description: Learn how to remove car scratches at home safely. Clear coat is often only 30–50 microns thick, so the right DIY method matters. (137 chars)
Cornerstone: false
Schema Page Type: Article
Social Title: Car Scratch at Home? Here’s the Safe Way to Fix It
Social Description: Not every scratch needs a body shop. This step-by-step guide shows Indian car owners how to inspect, reduce, and protect paint safely at home.
Social Image: use featured image
Secondary Keywords: diy car scratch removal, clear coat scratch repair, remove car scratches at home, car paint scratch fix India, scratch remover for car
## Conclusion
You don’t need to fear every scratch, but you do need to respect the paint.
If the damage is light, a calm DIY process can save money and restore the panel beautifully. If the scratch is deep, the smarter move is touch-up paint or professional help. That’s not failure. That’s good judgement.
**Key takeaways:**
– inspect first and clean the panel properly
– start with the least aggressive method
– compound only when lighter correction fails
– deep scratches need touch-up paint, not hope
– protect the paint after correction so the problem doesn’t come back
A scratch repair done gently is almost always better than one done bravely.
[INTERNAL-LINK: best car wax in India → next-step article on protecting freshly corrected paint for longer gloss]
▸ PUT IT INTO PRACTICE
Gear up at the Motor Headz garage
Coatings, polishes, foam wash & microfiber — made in India, free shipping over ₹499.